- 积分
- 640
注册时间2008-8-18
参与分
技术分
精华
该用户从未签到
|
转帖来源:http://forums.dfoggknives.com/index.php?showtopic=15551
I have inlaid guite a few items in the past with pieces of mosaicsteel, arty pieces like bowls and lids for boxes. What you see below issomething I have wanted to try for ages. Recently Ric and I have beenexchanging emails about swords and stuff and inlaying came up in theconversation. He sent me a link to myarmoury and in particular theAppearance of Iron Inlay thread.
So having read through that and looked at the wonderful work of JeffPringle and all the work Mikko Moilanen has done on the subject. I havehad a go.
To test out a few ideas I found a scrap of damascus with about 20+layers to use for inlaying a letter into. I made some small rods out ofcarbon steel and pure iron with 10 layers in. The rods were 5-6mmdiameter. From previous experience I know that there is no way you cankeep pieces in place on hot steel when the flux starts to melt. Theyjust skid around all over the place. With the arty pieces I usuallydrill through the steel and plug weld the mosaic in place, then forgeweld them in. The thread on myarmoury mentions various ways this couldand has been done. I choose to hammer dents/grooves into the bar so therods just laid in place. All this was done in gas forge. In a coke itwould be difficult to use this method as there is the likely hood ofthe knocking the inlay pieces out with the coals.
Here is the first piece,
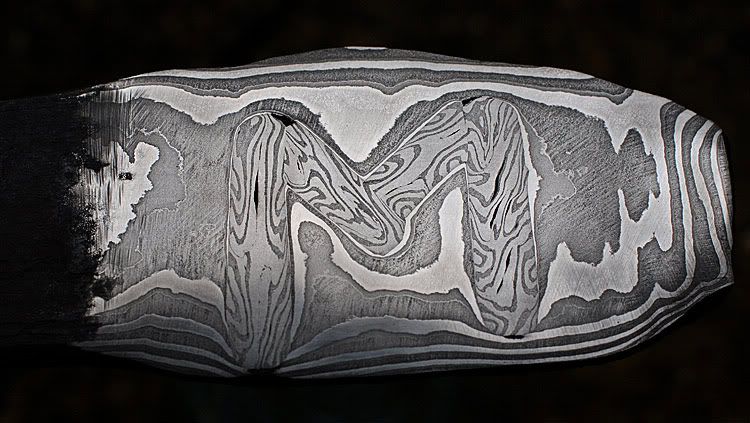
The splits in the layers are from trying to weld the two iron layerstogether when I folded the small billet. I learnt two things doingthis. No 1 is don't try to weld iron onto iron, make the billet up tothe layers you need, then weld up. No 2, the iron and steel inlay hasbecome alot softer with the addition of the iron so it feels "soggy" toweld. I think it would be better to use similars steels for the inlaysas the piece being inlaid into. The M has been made from 4 rods cut tofit into the grooves.
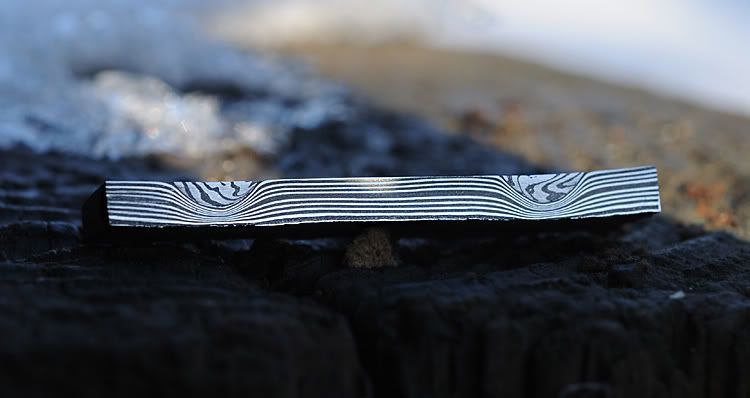
This is a cross section through the legs of the M showing how thelayers have moved with the hammering of the grooves and the welding ofthe inlay.
Now with this small success I have decided on something far more ambitious. I have always wanted to try putting MAXEN MEFECIT
into a pattern welded sword. I have one thats welded up but decided nottoo use that for pratice. Instead I used some left over bars from thisand welded them up into a 3 core bar 30mm wide. Each of these bars hasabout 15 layers and is an interupted twist with alternating clockwiseand anticlockwise twists (does that make sense, I'm not sure Iunderstand it myself).
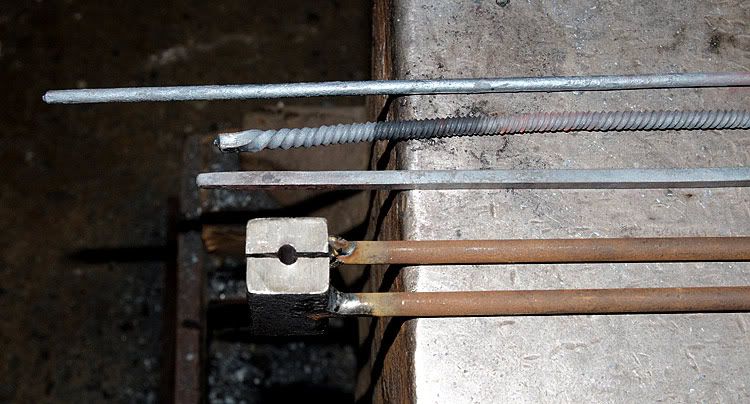
I made the rods out of 15N20 and 20C, the same steel that the 3 corebar is from. The rods have 10 layers in. I made about 9 feet of 6mm barout of a billet that started out as 30 x 30 x 130mm. I have plenty leftover. The next photo shows the stages of making the rods. As theletters are about 20mm tall the rods need to be tightly twisted and Ithink there is about 3-4 turns per inch. The piece of tooling at thebottom of the photo I knocked up quickly so that the bars were all asimilar size of 5mm.
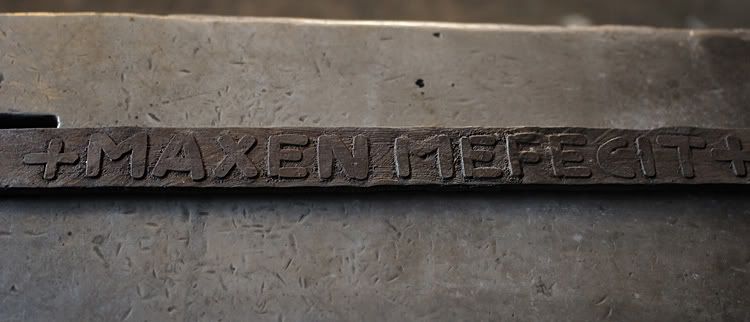
I carefully hammered the grooves into the 3 bar. This was a bit nerveracking as any screw up was going to leap out as a big mistake.Thankfully all went well. The length of + MAXEN MEFECIT + is about 10"and the letters are 3/4", 20mm tall.
The rods were ground down to 4mm and cut to fit the grooves. There are42 pieces in all. I did knock the bar once and 4 of my lettersdissappeared as they fell onto the floor. This is with all the piecesresting in place. The grooves are about 2mm deep.
I have messed about for what seems like ages with all these small rodsand now I need to move them, as I have decided to weld them up ingroups of 3-4 letters. All I can see happening now is when I move themthey are going to roll off the bench. Then I had a brain wave, I got apiece of tape and layed this over the rods, pressed down hard andcarefully pulled the tape away with all the pieces stuck to it. Thebest idea I have had in ages. The all I did was remove the rods inorder and put them into the grooves ready for welding.
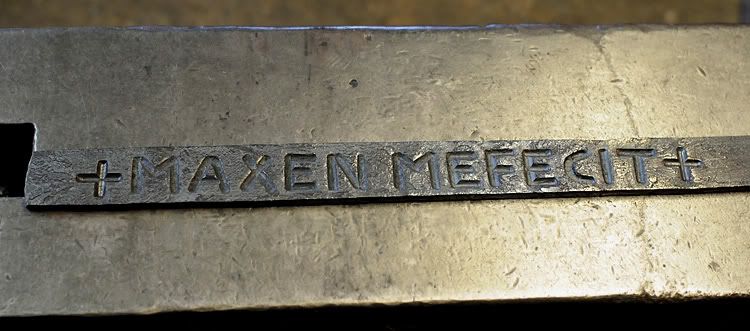
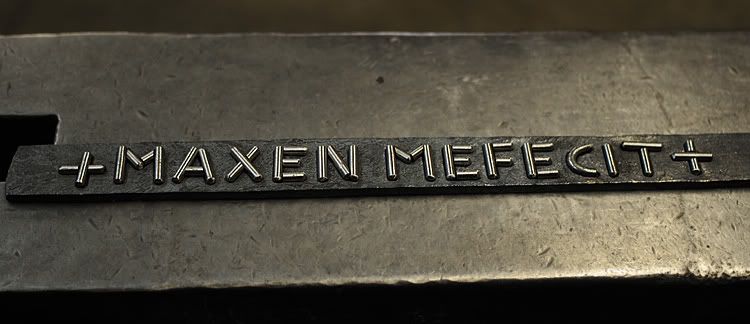
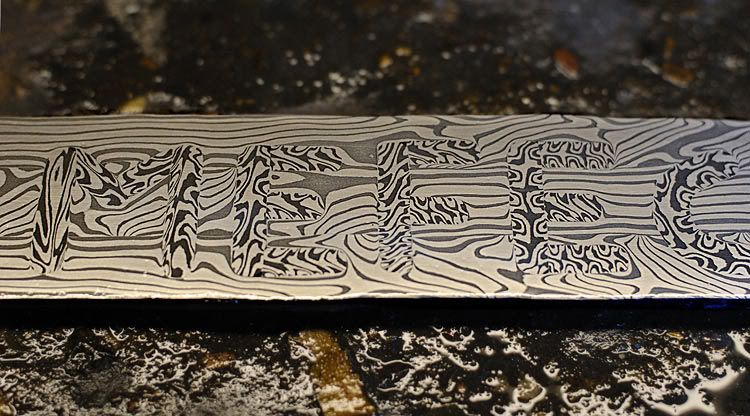
This photo shows all the letters welded up. They are probably about 1mm above the surface now.
All I am thinking now is has it worked or been a complete waste oftime. I shot blasted all the scale of and ground the bar down to 80grit, the finest I have at the moment. Must order some more. I thenhand sanded the bar down to 400 grit. There is something quite pleasingdoing this by hand as you can see the progress and the faint outline ofthe letters appearing. Breathing on the bar as well gives you afleeting glimpse of what there is within. In total there are about 7small areas that have not filled up with the inlayed rods. Strangelyenough these are all at the top or bottom of the vertical parts.Perhaps the chisel has a differant radius on one end.
So now I am like a kid in a sweet shop with eager anticipation as I wipe down the bar and get ready for the ecthing.
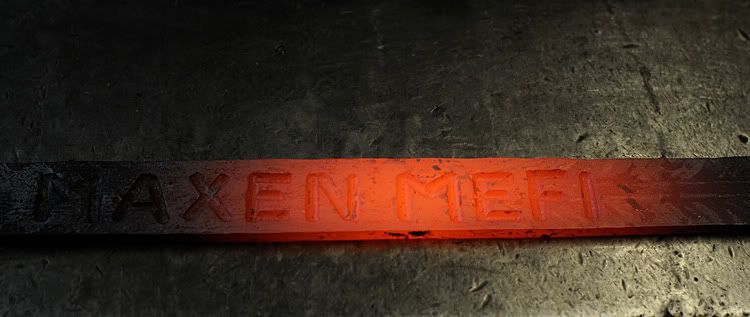
Here is the finished bar.
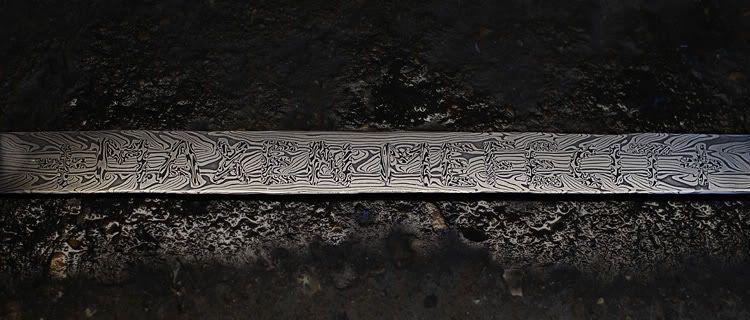
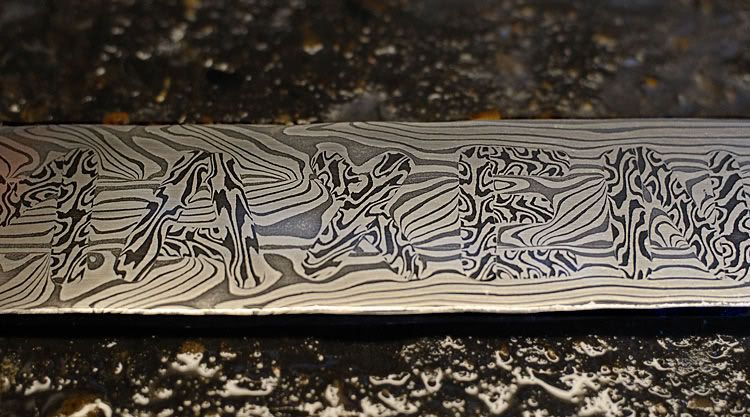
The bar was very difficult to photograph as the letters seem to be lostin the pattern, but if held at the right angle the letters show upbetter.
I don't know what the ratio is to pattern inlays or plain iron inlaysin swords are. But as a smith all those years ago who wanted to showoff their work, the pattern inlays are fancy but plain iron inlayswould leap out at you and be able to be read from a distance.
On a more historical note, I wonder when this sort of work was last done in England.
Mick. |
|


 发表于 2010-1-21 00:12


